How to Create a Separate Drive in Windows 10
Z7_3054ICK0KGTE30AQO5O3KA30N0
hp-concentra-wrapper-portlet
![]() Actions
Actions
HP PCs - Partitioning and Naming Drives (Windows 10, 8)
This document is for HP and Compaq computers with Windows 10 or Windows 8.
This document explains what drives, partitions, and volumes are, as well as how to add and delete partitions.
note:On HP business computers, the partitioning structure might be defined in computer management in business-related environments.

Understanding drives and partitions
A drive is a physical storage device such as a hard disk drive (HDD), solid state drive (SSD), or removable USB flash drive. A partition is an area of the drive that can be formatted and assigned a drive letter. A volume refers to a storage area on a partition of a drive. The terms partition and volume are often used interchangeably.
HP and Compaq computers come with a Windows (C) or C: drive, which is the partition for Windows and storing your files.
The following sections describe how to work with drives and partitions including how to add new drive letters, and create and remove partitions.
Adding a new drive letter
A new drive letter is added when you partition existing space on the drive, or when you add more physical storage space to the computer.
-
Partition the existing hard disk drive (HDD) or solid state drive (SSD) to create a separate storage area (partition) using empty space on the drive. Windows labels the new partition with its own drive letter and uses the partition as a separate drive. Making a new partition might be useful if you need to share files on a drive, but want to prevent access to your personal files by keeping those files on a separate drive.
-
Install an additional hard disk drive (HDD) or solid state drive (SSD) to add more physical storage for photos, videos, music, or other files. Windows automatically assigns a new drive letter when you add a new drive.
-
Desktop computers: Most mid-tower or larger desktop computers have one or more extra drive bays to accept an additional internal HDD or SDD. For information on installing an additional hard drive, see the Maintenance and Service Guide for your computer for specific hard drive replacement instructions. To find the guide, go to HP Customer Support, and then navigate to the product page for your computer.
-
Notebook and All-in-One (AiO): Most notebooks and All-in-One (AiO) computers do not have space for an additional internal hard disk drive. Instead, connect an external hard drive using a cable, USB, or wireless connection to the computer.
-
Creating a new partition on the C: drive
To create a new partition, the hard disk drive (HDD) or solid state drive (SSD) must contain unallocated space that is not part of an existing partition. Shrink the volume on an existing drive to create unallocated space, and then create and format a new partition.
-
In Windows, search for and open Create and format hard disk partitions.
-
Right-click the Windows (C:) drive on the computer.
caution:
Do not partition volumes named System Reserved, Recovery, Factory_Image or HP_Tools. Do not use these volumes for file storage. Doing so might prevent you from being able to troubleshoot startup issues or perform a recovery in the event your computer encounters a major problem.
-
Click Shrink Volume from the menu to create unallocated space.
The Shrink window opens.

-
Without making any changes to the settings in the Shrink window, click Shrink.
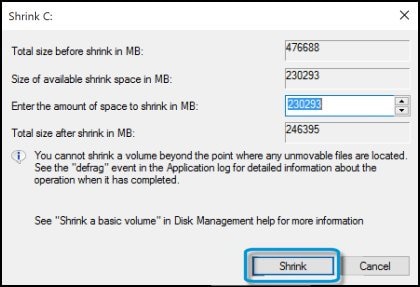
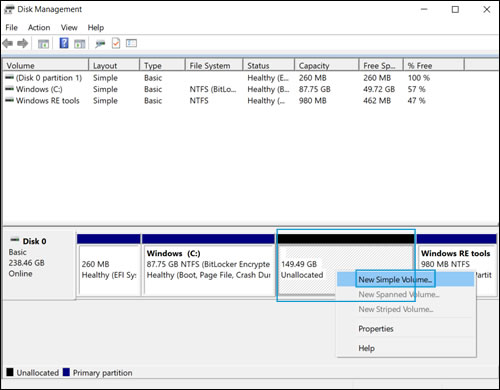
When the shrink process completes, the new partition displays in the Disk Management utility as Unallocated space.

-
Right-click the new partition, and then select New Simple Volume in the drop-down menu.
-
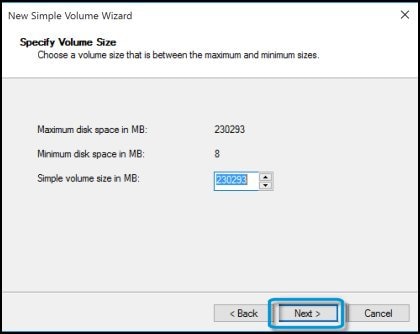
When the New Simple Volume Wizard opens, click Next.
The Specify Volume Size window displays.
-
Click Next to accept the default setting (recommended), or change the value in the Simple volume size in MB field, and then click Next.
The Assign Drive Letter or Path window displays.
-
Select a drive letter from the menu, and then click Next.
The Format Partition window displays.

-
To name the drive, type a name in the Volume label field.
note:
Make sure Perform a quick format and Enable file and folder compression are not selected.
-
Click Next.

-
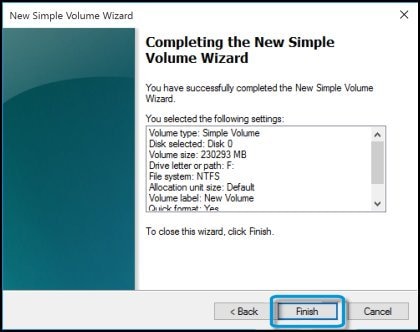
When the Completing the New Simple Volume Wizard window displays, click Finish.
note:
If an AutoPlay window displays, click the X in the top right corner to close it.
-
Wait while the new volume formats. The Disk Management utility displays the formatting progress, and then assigns the New Volume a drive letter.
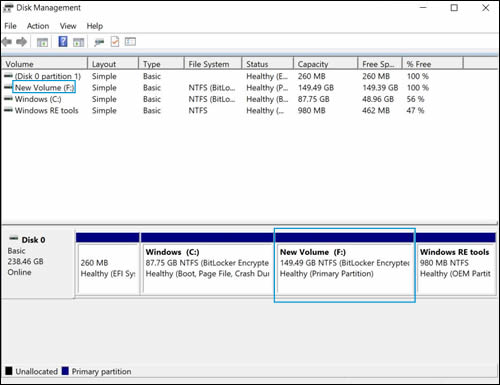
Changing a drive letter
You can assign the letters D through Z to each hard disk drive (HDD) or solid state drive (SDD) on the computer.
note:Some Windows applications refer to specific drive letters. Changing a drive letter might cause an application installed on the drive to stop working correctly. You cannot change a drive letter if the drive is a system or boot partition.
-
In Windows, search for and open Create and format hard disk partitions.
-
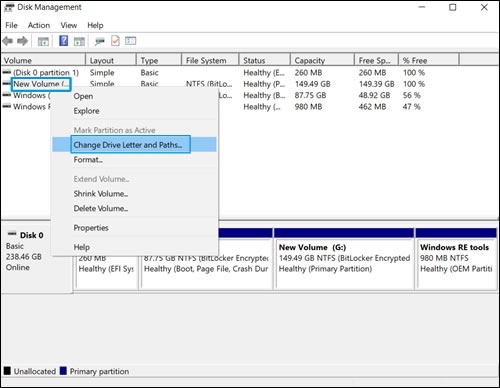
Right-click the partition or drive you want to rename, and then select Change Drive Letter and Paths from the menu.

-
In the Change Drive Letter and Paths window, click Change.

-
Select the new drive letter from the menu, and then click OK.

-
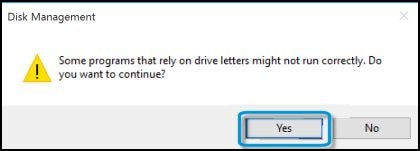
On the Disk Management caution window, click Yes to continue.
-
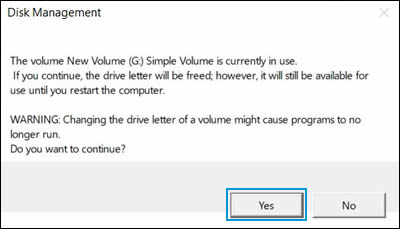
If the following message displays, click Yes to change the drive letter.
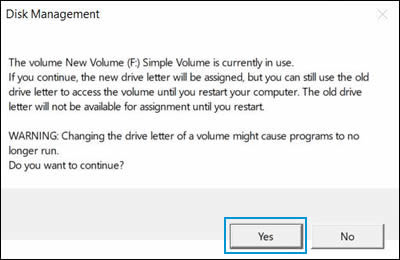
The drive letter is changed.
Removing a drive letter
Before you delete a drive letter, back up any data you want to keep onto a different drive.
-
In Windows, search for and open Create and format hard disk partitions.
-
Right-click the drive letter you want to remove, and then select Change Drive Letter and Paths in the menu.
-
In the Change Drive Letter and Paths window, click Remove.

-
On the Disk Management caution window, click Yes to continue.

-
If the following message displays, click Yes to remove the drive letter.
The drive letter no longer displays. To use this hard disk drive (HDD) or solid state drive (SSD) space again, continue to the next section.
Removing a partition
You can remove a partition and reallocate space on the disk.
note:Before you remove a partition, back up any data you want to keep onto a different drive.
-
In Windows, search for and open Create and format hard disk partitions.
-
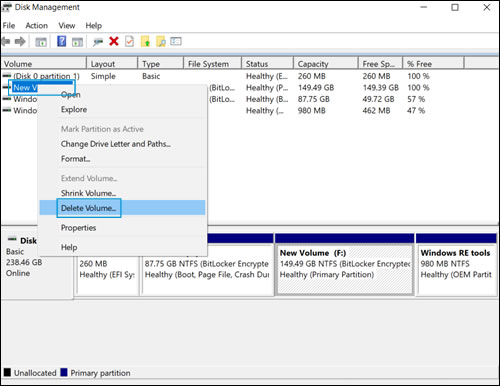
Right-click the volume or partition you want to delete, and then select Delete Volume from the drop-down menu.
-
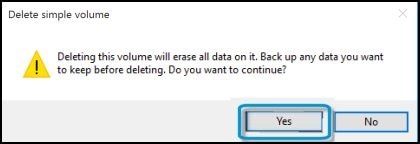
If you have backed up the data you want to keep onto another drive, click Yes on the Disk Management caution window.
note:
If a Bitlocker Drive Encryption warning displays, click Yes.

-
If a warning message displays, the partition or drive you are trying to change might be in use. Close any application or window that is using the partition or drive and try again.

The drive letter no longer displays and the partition is labeled as Unallocated space.

-
Right-click the drive where you want to add the unallocated space. Click Extend Volume in the menu.
The Extend Volume Wizard opens

-
Click Next, on the Extend Volume Wizard window.
The Select Disks window displays.
-
Do not change any settings. Click Next.

-
Click Finish.

The disk space is now reallocated and can be used.
How to Create a Separate Drive in Windows 10
Source: https://support.hp.com/id-en/document/c03375417
0 Response to "How to Create a Separate Drive in Windows 10"
Post a Comment