How to Remove Disk Checking in Windows 10
Hello everyone! Sometimes a Windows computer runs a disk check on startup. It happens every now and then on every computer, but for some people it happens every time they start their computer up.
When it shows up, you have 8 seconds to skip it by pressing any keyboard key, and if you have to do this every time the computer starts up it definitely gets a bitAnnoying.
Why does it happen?
Disk checks are triggered by Windows automatically when the computer didn't shut down cleanly, when it sensed a problem with the file system or the hard drive, and for other reasons. If it happens every now and then it's normal but if it runs every time you start your computer up then there may be a problem that needs to be fixed.
Since frequent disk checks can signify that your hard drive is faulty, I strongly recommend that you backup your hard drive on an external storage drive as soon as possible because you risk losing your files at any moment. After you have your important files backed up, continue to the methods below to fix the problem.
Method I and Method II will try to actually solve the disk issue, but if you're not really interested in that and you just want to disable the disk check, you can go directly to Method III.
Method I: Fix the error using CMD
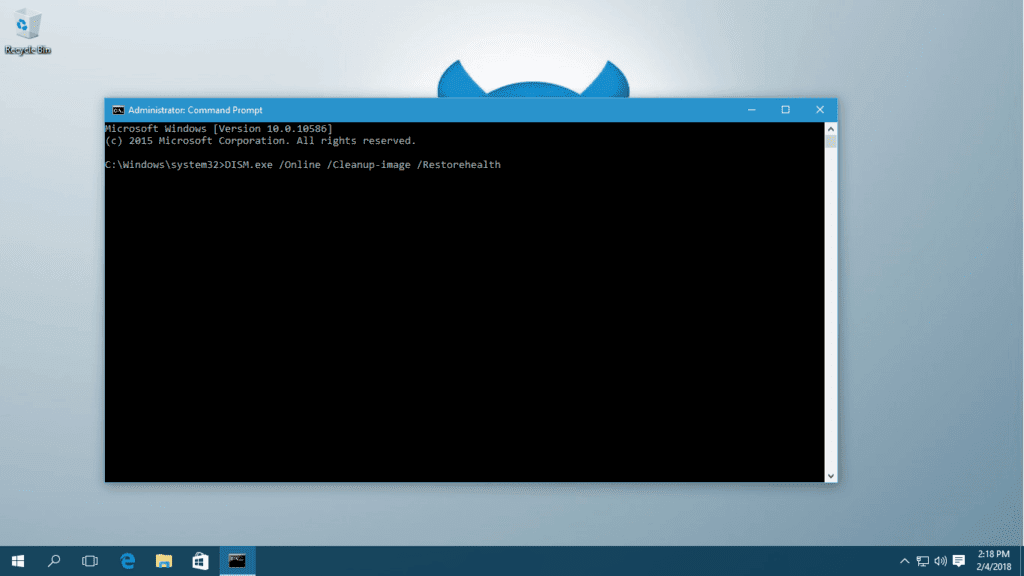
I would like to begin with this couple of commands in order to check for system and disk errors and try to fix them. If you've read any of my previous guides, you'll know how much I love those magical commands, they save tons of time and energy… Here we go:
DISM.exe /Online /Cleanup-image /Restorehealth
(note the spaces before each "/").
- Type the following command then pressE nter:
sfc /scannow
(make sure you put a space between "sfc" and "/scannow")
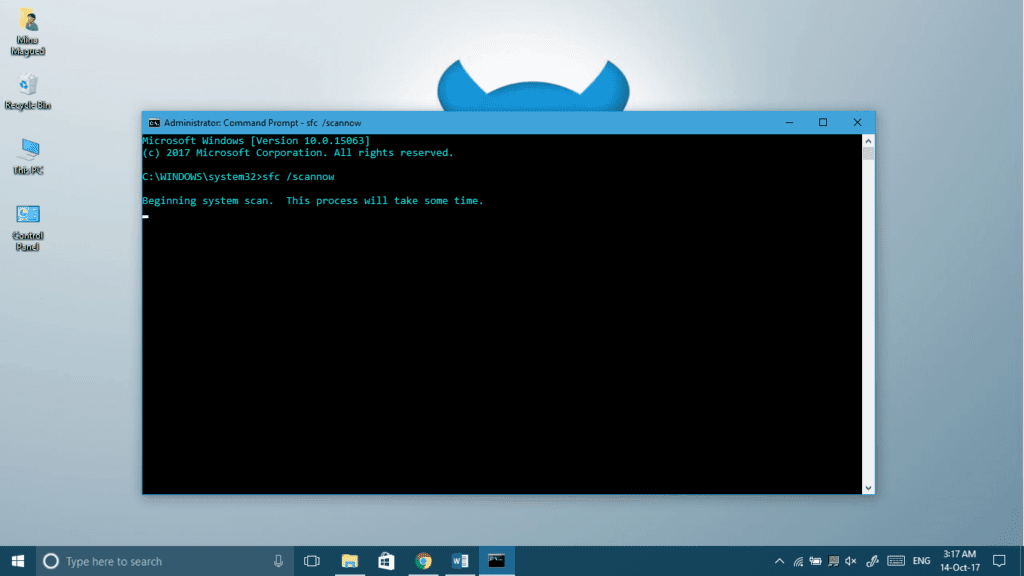
Now you should perform a couple of restarts and see if it worked and the auto CHKDSK is gone. If it still happens when you start up, then try the next methods.
Method II: Check for drive errors
In general, the C drive is the most important one because it's carrying all the Windows installation files. Therefore, we will check for errors in this drive. Of course, you can do this for all of your remaining drives, it's going to be the exact same procedure. Let's do it:
Once this is done, give your computer a couple of restarts and see if the problem still occurs. Method II was the last software methods of fixing your hard drive, so if it the disk check at startup still happens, I recommend to just have backups done regularly (in case there is a real problem with the hard drive), and go to method III to stop this disk check nonsense with brute force 🙂
Method III: Stop auto disk check using Registry Editor
First of all, the Registry Editor is an advanced control panel which controls every little part of your system, so if you're not familiar with it, we would advise that you back up your registry just in case. Yeah, back up your registry separately from the regular hard drive backup. Visit our Backup your Registry article which is going to help you. At any case, follow the instructions carefully and no harm should come to your computer:
Computer\HKEY_LOCAL_MACHINE\SYSTEM\CurrentControlSet\Control\Session Manager
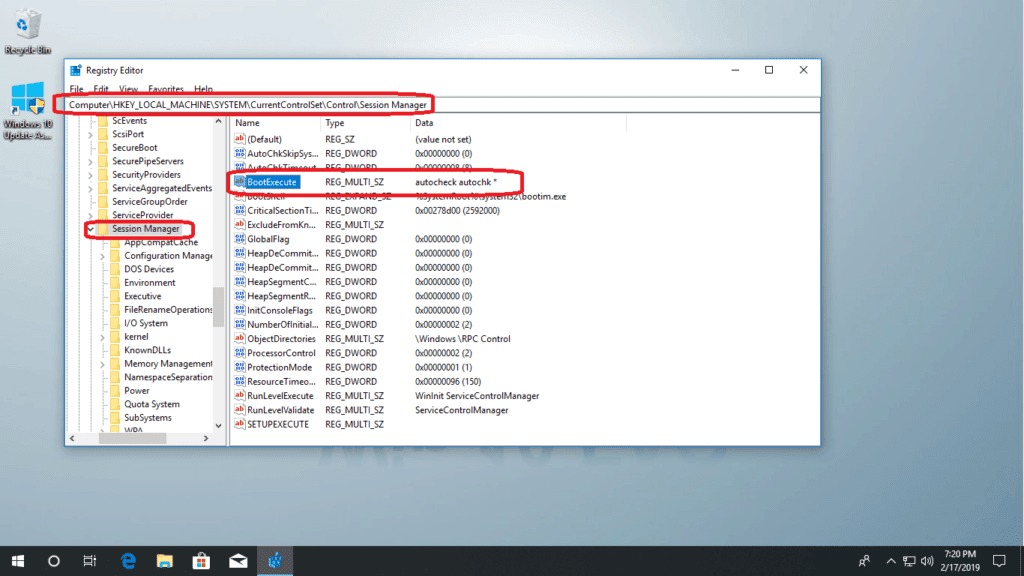
- Now delete all the lines in Value data and paste this then press Ok:
autocheck autochk *
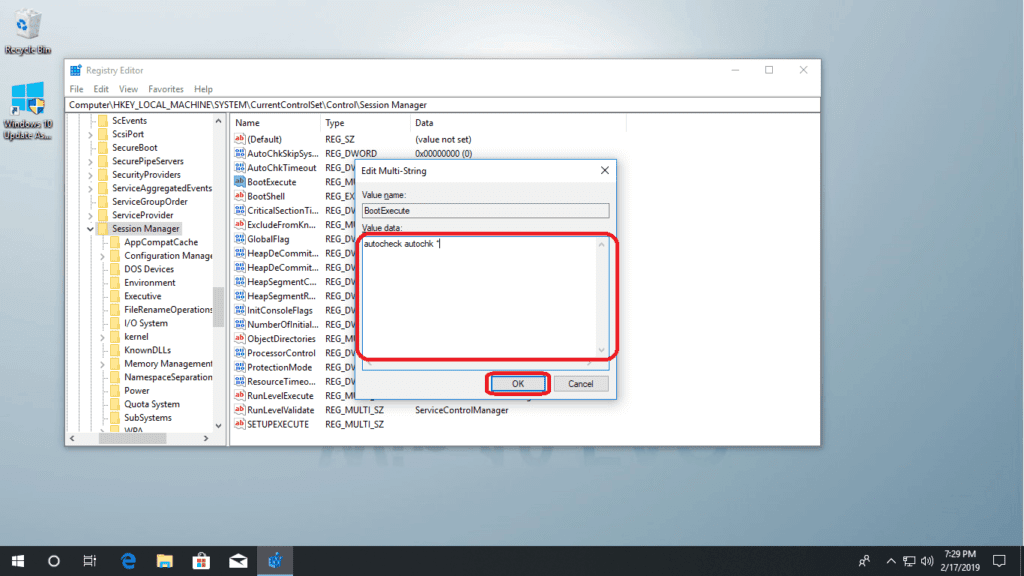
Here we go, now give your computer a couple of restarts, this was tested by many and it stops the auto disk check completely.
Other solutions found online:
There is a solution on many websites advising you to run this command in your CMD to exclude a certain drive from disk check at startup (it's the C drive in this example):
chkntfs /x C:
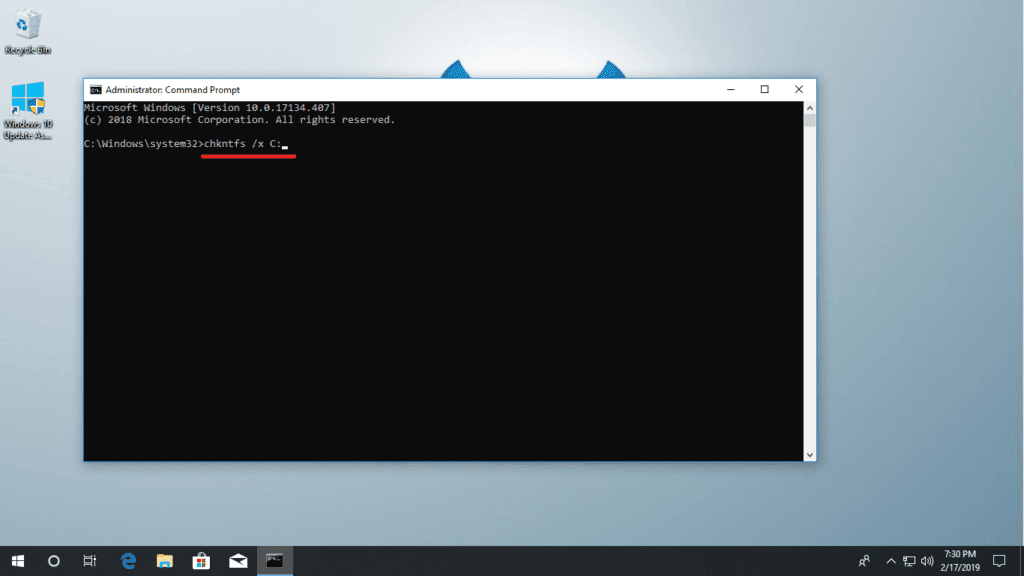
You can definitely do that, and it would work. I personally prefer the registry method editor, as that one stops disk check for all the hard drives at the same time.
How to Remove Disk Checking in Windows 10
Source: https://win10faq.com/how-to-stop-disk-check-on-startup-windows-10/
0 Response to "How to Remove Disk Checking in Windows 10"
Post a Comment